
Complete Guide to Running MT5 EAs on Exness (2026 Edition)
Contents
- Exness vs. XMTrading: What's the Difference?
- Step 1: Create Your Account (approx. 5 minutes)
- Step 2: Create a Live Trading Account (approx. 5 minutes)
- Step 3: Complete Identity Verification (KYC)
- Step 4: Install MT5 (approx. 5 minutes)
- Step 5: Make a Deposit
- Step 6: Install and Activate Your EA
- Troubleshooting Checklist: EA Not Running
- Summary: Setup Completion Checklist
- FAQ
Complete Guide to Running MT5 EAs on Exness (2026 Edition)
Exness is one of the world's highest-volume brokers, renowned for its three defining strengths: tight spreads, instant withdrawals, and leverage up to unlimited. It pairs exceptionally well with EAs and is especially popular among advanced traders running scalping EAs.
What you'll learn in this article
- Choosing the right Exness account type (Standard vs. Raw Spread)
- Step-by-step account registration with screenshots
- Recommended leverage and currency settings
- How to download MT5 and log in
- How to install and activate your EA
The entire process takes approximately 25 minutes the first time.
Exness vs. XMTrading: What's the Difference?
If you're trying to decide between the two, here's a comparison from an EA trading perspective.
| Comparison | Exness | XMTrading |
|---|---|---|
| Spread | Tight (Raw Spread: from 0 pips) | Slightly wider |
| Bonus | None | Up to $10,500 |
| Minimum deposit | From $10 | From $5 |
| Leverage | Up to unlimited | Up to 1,000x |
| Withdrawal speed | Instant (e-wallets) | Typically 1–3 business days |
| Japanese language support | Yes (chat) | Yes (phone & chat) |
XM is a better fit for starting small; Exness wins if spread costs are your priority. Ideally, once you're comfortable, hold accounts at both brokers and switch depending on the EA type.
Step 1: Create Your Account (approx. 5 minutes)
1-1. Register via the affiliate link
1-2. Enter your basic information
Fill in the registration form with the following.
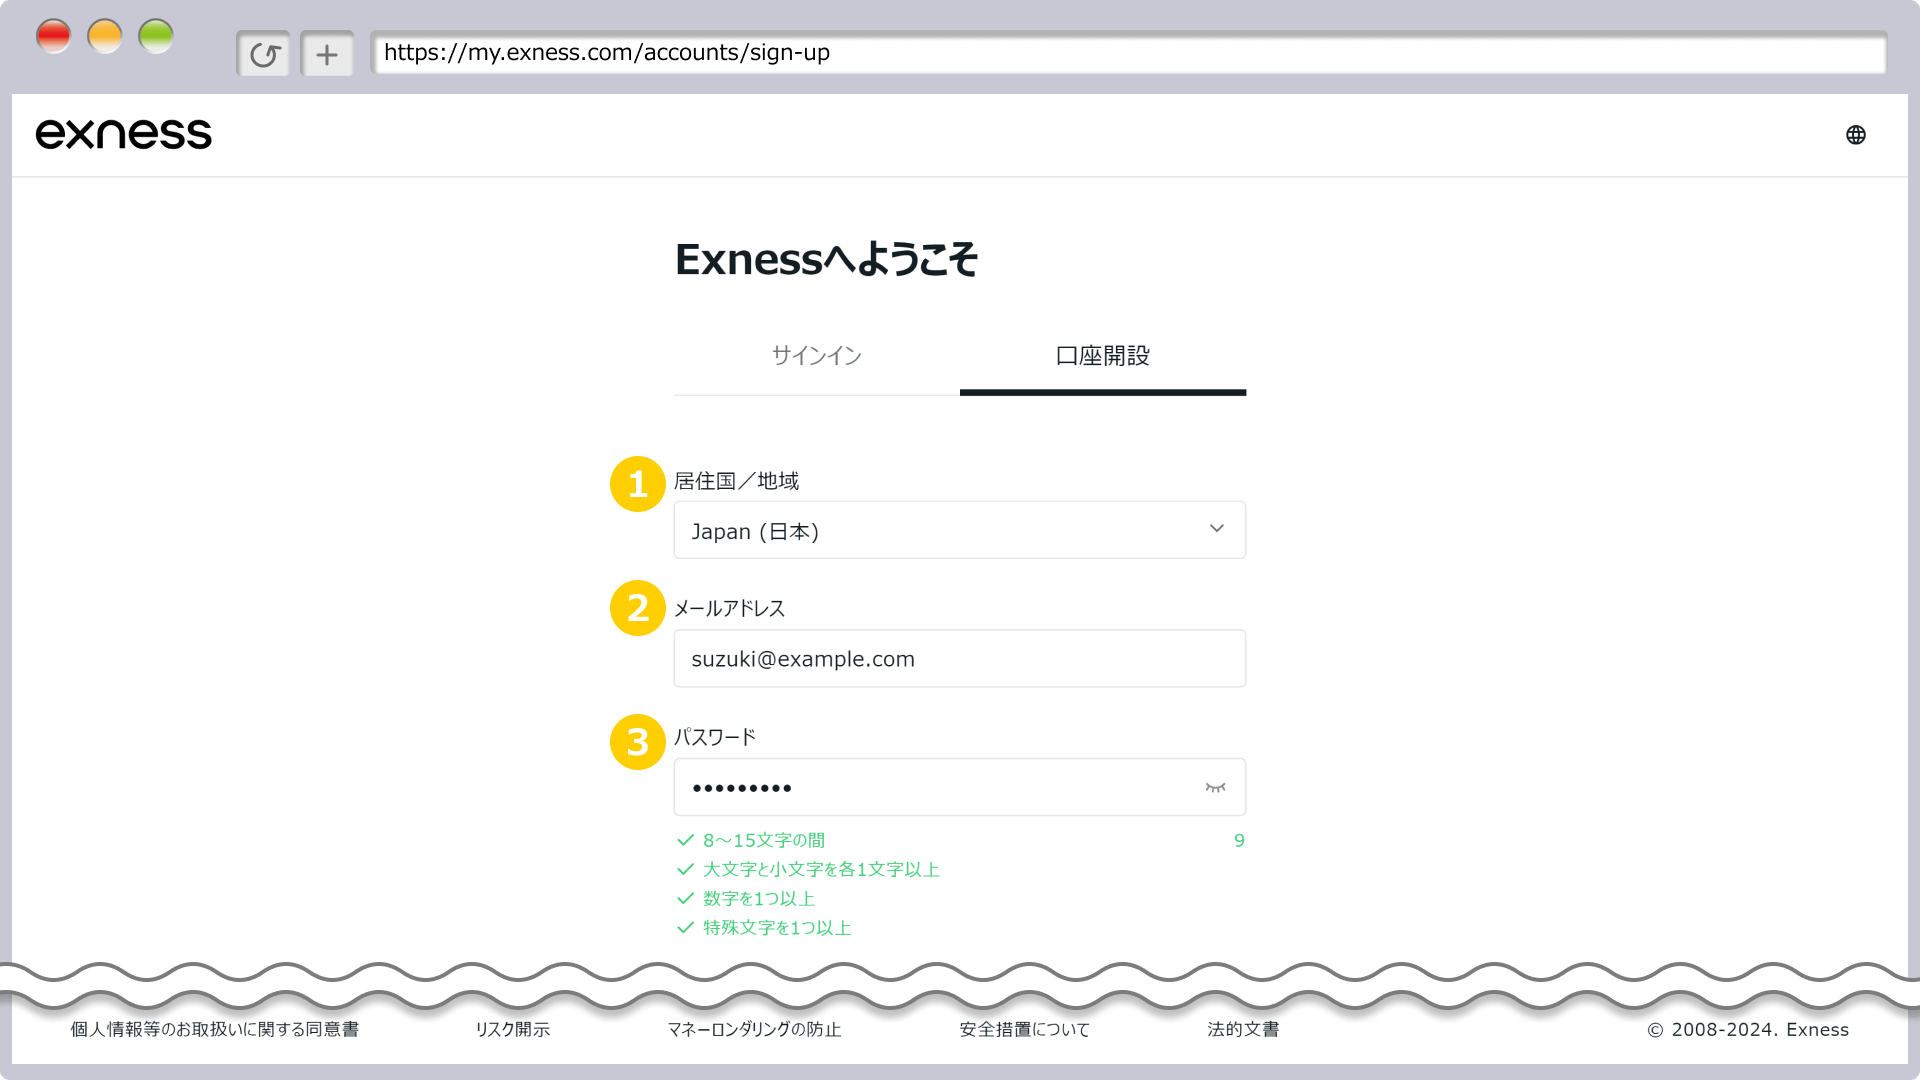
- Country of residence: Select Japan
- Email address: The address you'll use to log in
- Password: 8–15 characters including uppercase, lowercase, numbers, and symbols
After clicking "Continue," a confirmation email will be sent to your registered address. Click the link to complete verification.
Step 2: Create a Live Trading Account (approx. 5 minutes)
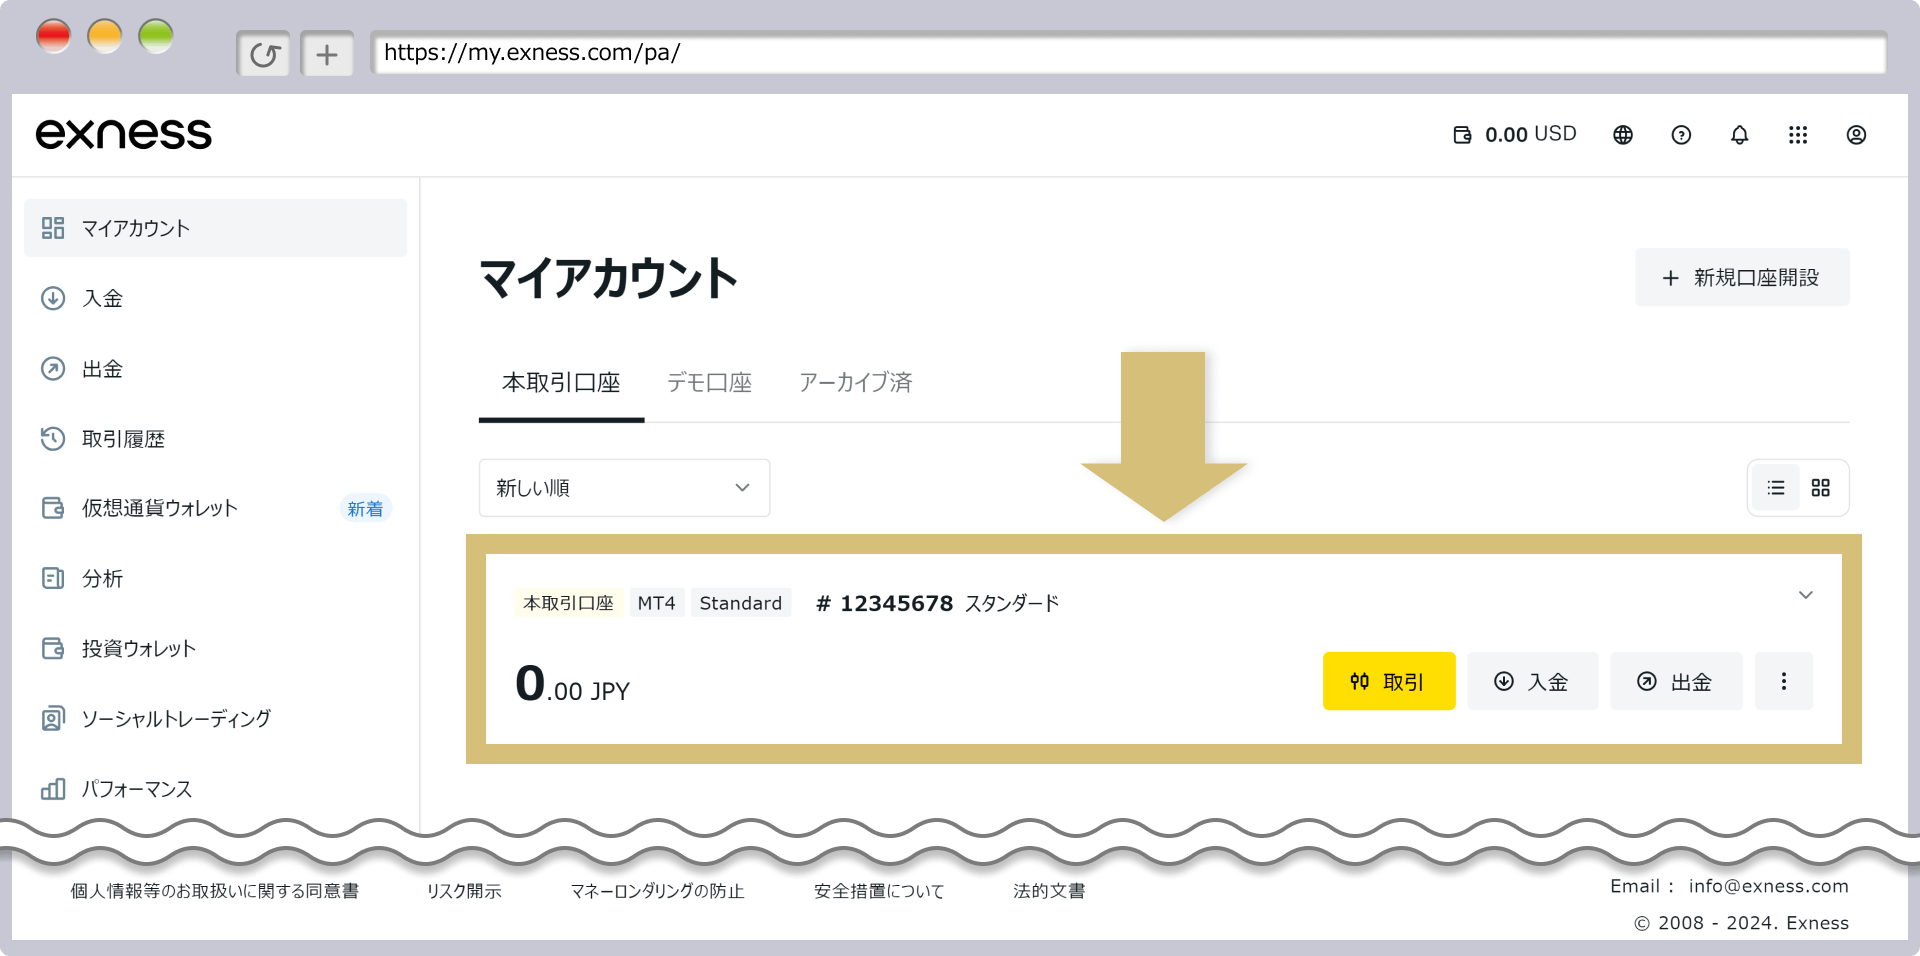
2-1. Review the My Account screen
After logging in, you'll see the My Account screen. Click "+ Open New Account" in the upper right.
2-2. Choose your account type
Select the account type for running EAs. Beginners should choose Standard; if spread is your priority, choose Raw Spread.
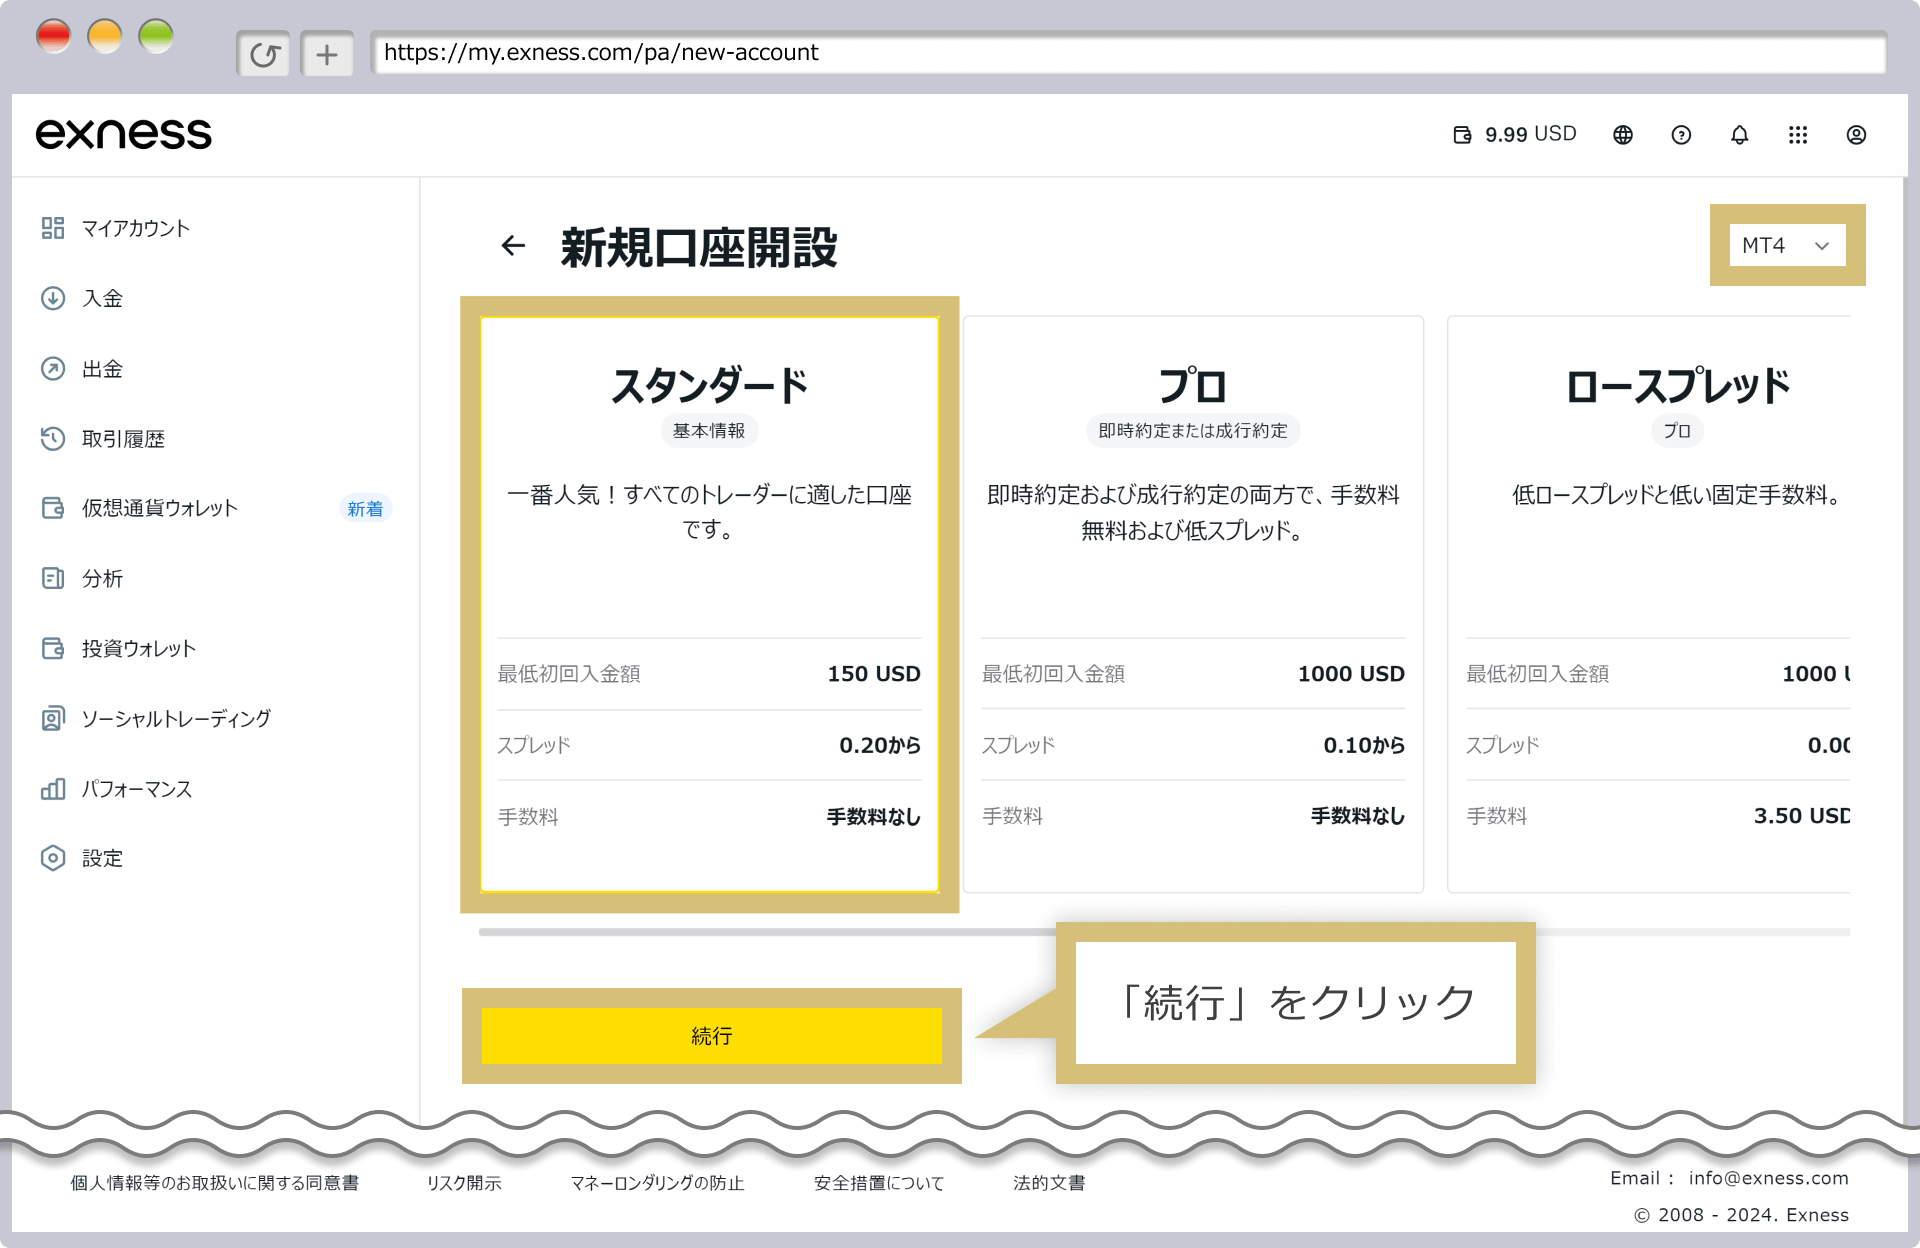
| Account Type | Min. Deposit | Spread | Commission | Best For |
|---|---|---|---|---|
| Standard | $150 | Variable (from 0.2) | None | Beginners, small starting capital |
| Pro | $1,000 | Variable (from 0.1) | None | Intermediate to advanced traders |
| Raw Spread | $1,000 | From 0.0 | $3.50/lot | Scalping EAs, high-frequency trading |
| Zero | $1,000 | 0.0 (fixed) | $3.50/lot | Ultra-high-frequency trading |
2-3. Configure your account details
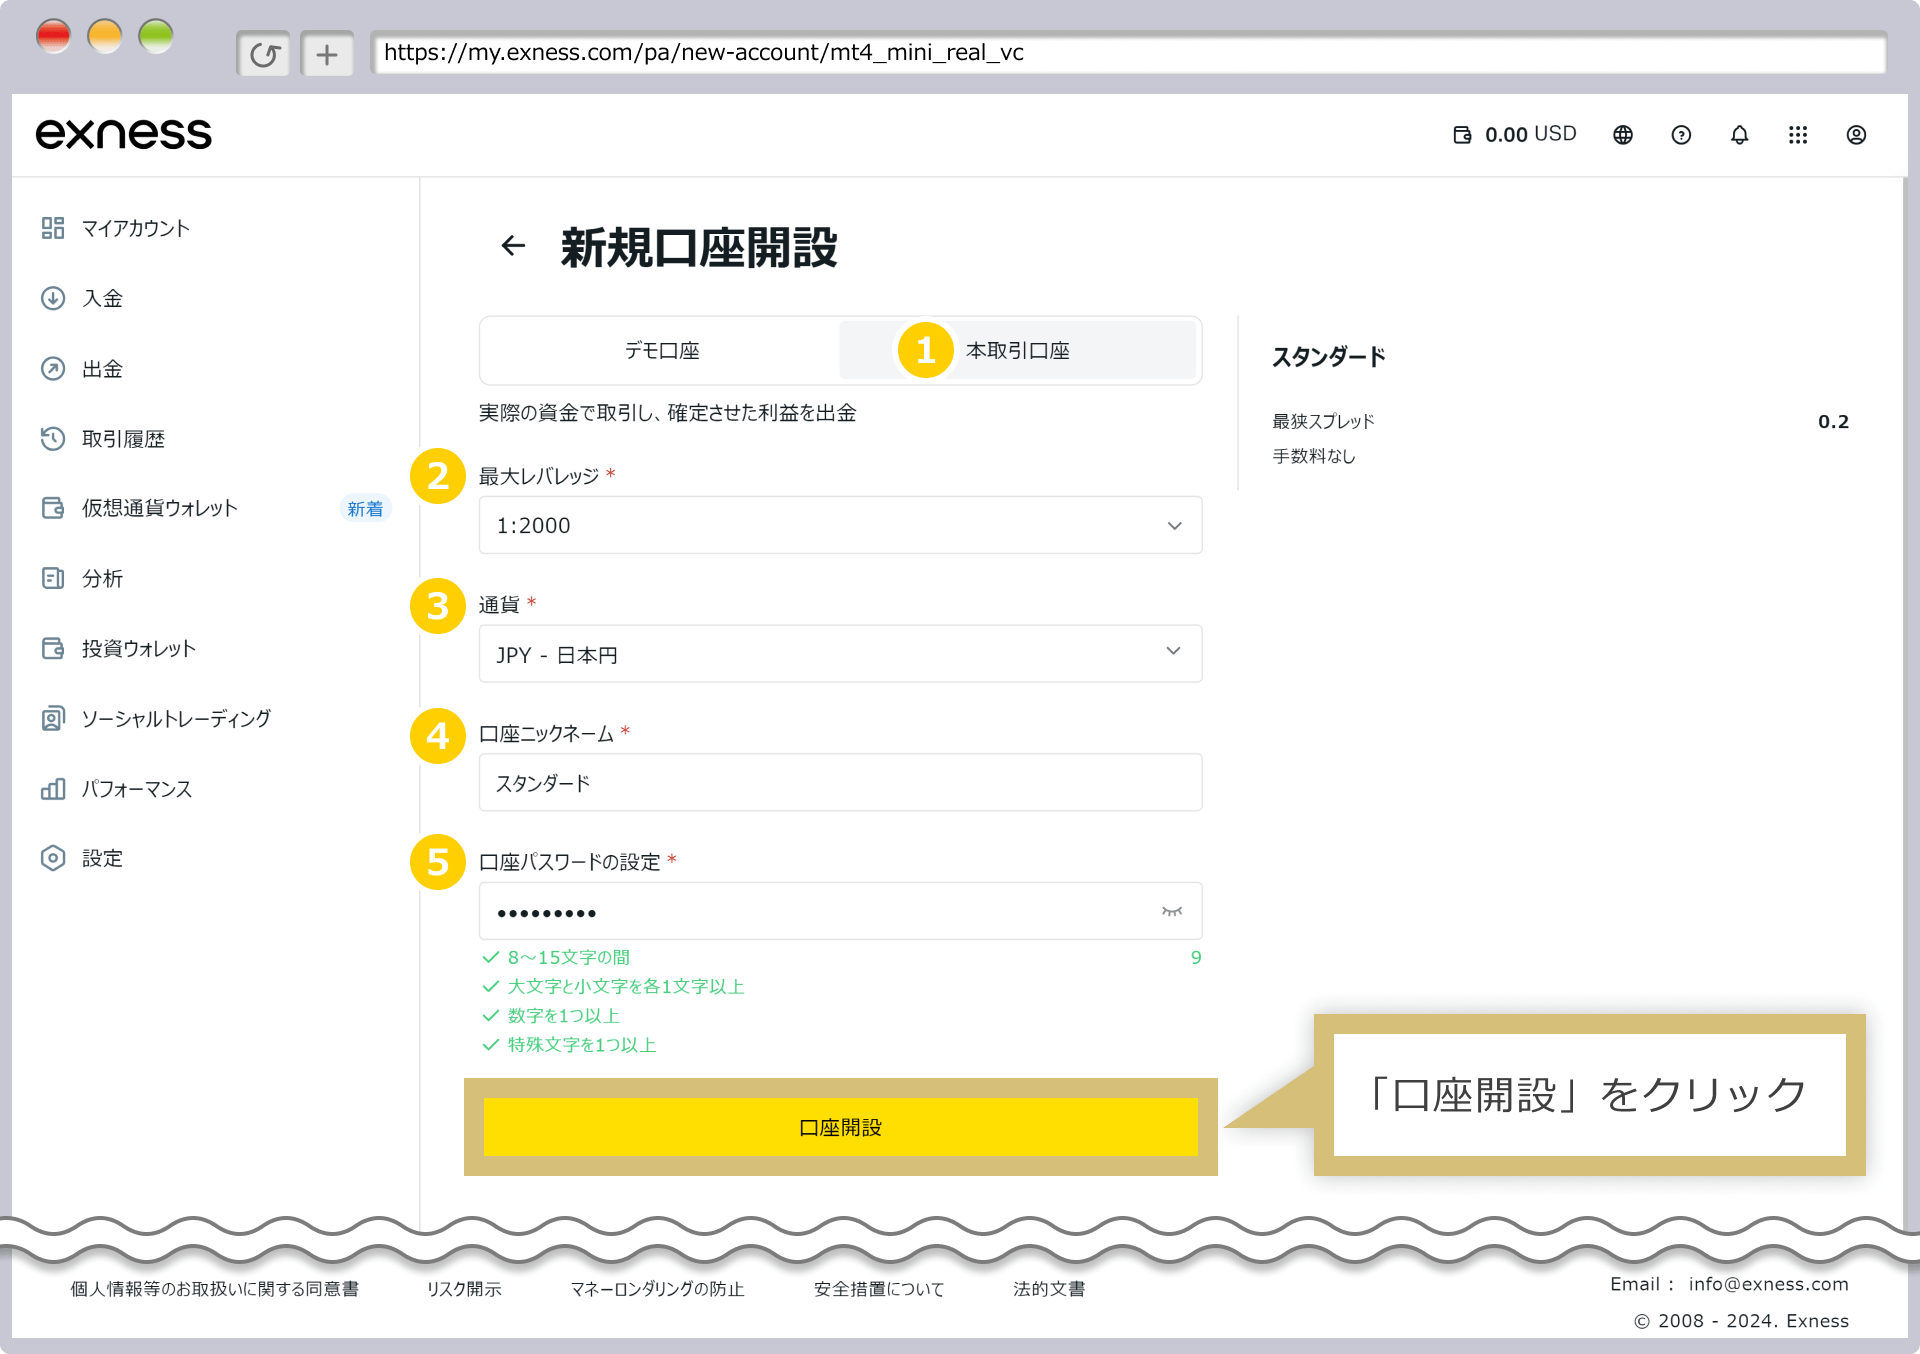
Recommended settings:
- Account type: Live account
- Maximum leverage: 1:2000 (default)
- Currency: USD — or your preferred base currency
- Account nickname: Something easy to recognize (e.g., "Standard")
- Account password: Used to log in to MT5. You cannot retrieve this later, so write it down immediately
Click "Create Account" and the new account will appear in your My Account screen.
Important: Exness does not send your account number or password by email after account creation. You can view and change these in the My Account screen. Since you'll need the password to log in to MT5, make sure you note it down at the time of creation.
Step 3: Complete Identity Verification (KYC)
Identity verification is required before you can make withdrawals. You can start depositing and running EAs beforehand, but it's strongly recommended to complete KYC early.
Documents required:
- Proof of identity (passport, driver's license, or national ID card)
- Proof of address (utility bill, bank statement, or residence certificate issued within the last 6 months)
You can upload photos taken with your smartphone. Review typically takes 1–3 business days.
Step 4: Install MT5 (approx. 5 minutes)
4-1. Download MT5
Download MT5 from your Exness My Account page or from the MetaQuotes official website.
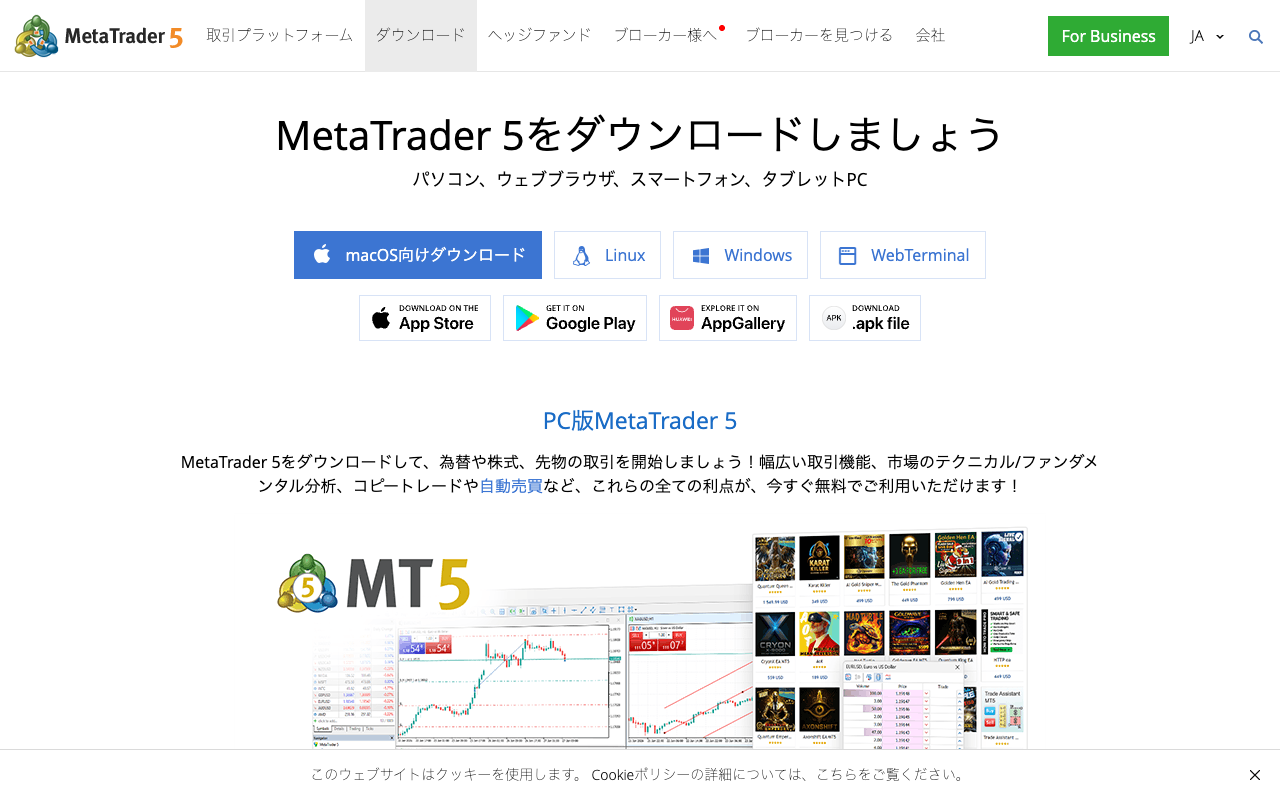
Some EAs may not work properly on the Mac version. The Windows version is recommended.
4-2. Log in to MT5
Launch MT5, go to "File" → "Open an Account," and log in.
| Field | What to Enter |
|---|---|
| Login ID | Your account number shown in My Account |
| Password | The password you set in Step 2-3 |
| Server | e.g., Exness-MT5Real (shown in My Account) |
Step 5: Make a Deposit
Recommended deposit methods
| Method | Processing Time | Fee |
|---|---|---|
| Credit card (VISA/MC) | Instant to a few minutes | Covered by Exness (free) |
| bitwallet | Instant | Covered by Exness |
| Domestic bank transfer | 1–3 business days | Transfer fee only |
Minimum deposit: $10 (For a Standard account, $150 is the practical recommended minimum)
Deposits in local currency are accepted. Exness handles the conversion automatically.
Step 6: Install and Activate Your EA
6-1. Install the EA file
- In MT5, go to "File" → "Open Data Folder"
- Copy your EA file (
.ex5) into theMQL5→Expertsfolder - Restart MT5
6-2. Attach the EA to a chart
Open the chart for the target symbol and timeframe, then drag and drop the EA from the Navigator panel onto the chart.
Items to check in the settings window:
- "Allow automated trading" → Check ON ✓
- "Allow DLL imports" → ON ✓ for EAs that require it
- Verify parameters such as RiskPercent and MagicNumber
6-3. Turn on automated trading
Confirm that the "AutoTrading" button at the top of MT5 is green, and that the EA icon in the upper-right corner of the chart shows a smiley face.
Troubleshooting Checklist: EA Not Running
| Symptom | Solution |
|---|---|
| AutoTrading button is grey | Click the button to turn it ON (green) |
| EA icon shows "×" | Enable "Allow automated trading" in EA settings |
| "Not enough money" | Check your balance and lot size settings |
| "Trade is not allowed" | Check if the market is closed or review account settings |
| No entries, no errors | This is normal. The EA will enter automatically once conditions are met |
Summary: Setup Completion Checklist
- Exness account registered and email verified
- Live trading account created (account number and password noted)
- MT5 downloaded and successfully logged in to Exness server
- Deposit completed (minimum $10 or more)
- EA file placed in
MQL5/Expertsand MT5 restarted - EA attached to chart with "Allow automated trading" ON
- AutoTrading button at top is green; EA icon shows smiley face
- No errors in the Experts tab (bottom of MT5)
FAQ
Q: Is it true that Exness offers unlimited leverage?
Leverage is automatically adjusted based on your account balance and margin ratio. Higher leverage is available when your balance is lower, but the ceiling decreases as your balance grows. "Effectively unlimited" is closest to reality when your balance is small.
Q: Can I trade without completing KYC?
Depositing and trading are possible before KYC is complete. However, KYC is required before you can withdraw funds. To avoid a situation where you've made profits but can't withdraw them, it's strongly recommended to complete KYC before making your first deposit.
Q: What is the Exness MT5 server time?
The Exness MT5 server operates on GMT+0 (winter time) or GMT+1 (summer time). The difference from Japan Standard Time (JST) is +9 hours in winter and +8 hours in summer. For time-based EAs (e.g., those targeting the Asian session), make sure the session hours are configured in server time.
Q: Are there any special settings needed when using Exness on a VPS?
The basic setup is the same as on a local machine. If the VPS IP address differs from the one used during initial login, you may receive a security confirmation email — simply approve it and you can continue as normal. For information on choosing a VPS, see the VPS information page.
Related
📧 Free 8-email course + subscriber-only pack of 13 MT5 indicators
Right after you sign up, you get a download link for a subscriber-only pack of our 13 MT5 indicators: compiled files (.ex5), source code and a setup guide. Then 8 emails on algo-trading essentials, reading backtests correctly and choosing a broker (one a day for the first 5 days, then 7, 14 and 30 days after signing up). You also get notified before each price rise of the versions sold on the MQL5 Market (launch pricing that steps up as copies sell). Our EAs are free on this site with a live account at a partner broker.
* Privacy strictly protected. You can unsubscribe at any time.
Have a question about EAs or FX?
You can post it on the Nattzy trading forum (free sign-up). Questions beyond this article are welcome too — EA settings, choosing a broker and more.
Ask on Nattzy ↗